

Layered Fabric Panels
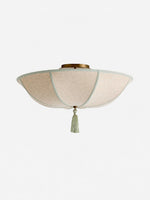
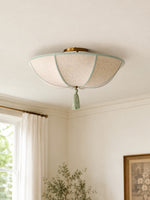
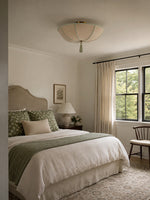
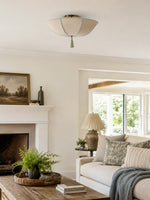
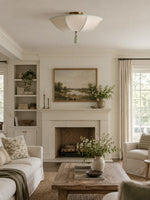
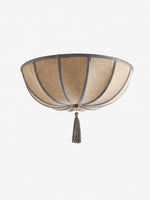
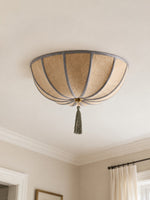
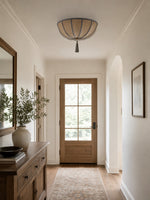
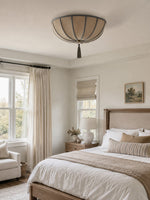
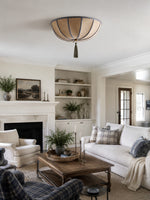
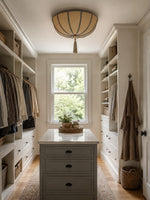
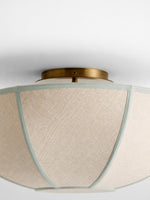
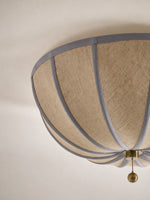
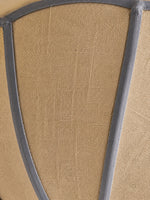
Each panel overlaps to build the rounded floral silhouette.


Buy 1
Buy 2
Buy 3+
Orders over $330
Orders over $500
 Free Shipping
 14-Day Returns
 Secure Payment
 Customer Service
Valoflor Series
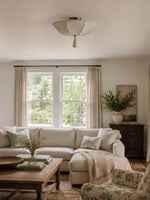
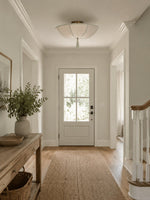
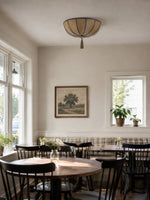
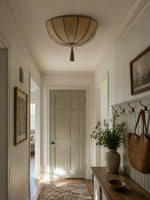
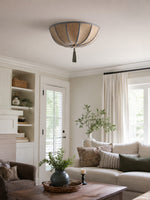
The Valoflor Collection draws on soft, floral inspirations with layered petal silhouettes and sculptural forms. Crafted from metal and fabric, these flush-mount fixtures cast warm, ambient light that enhances living rooms, bedrooms, dining areas, or entryways with timeless, nature-inspired style


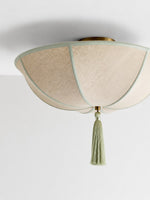
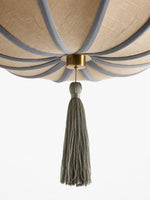
Two floral profiles pair light-beige fabric with sage green or dusty blue trim. The flush-mount form keeps the room open while the layered shade brings softness overhead.


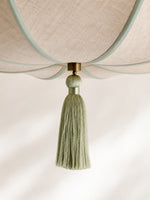
Valoflor translates the rhythm of overlapping petals into a fabric shade. Curved ribs define each panel, while the tassel adds a gentle finishing detail beneath the fixture.
Overlapping fabric panels create depth without making the ceiling feel heavy.
The woven surface gives the light a warmer, more natural presence.
A close-to-ceiling silhouette suits bedrooms and everyday living spaces.
A small hanging detail completes the floral composition.
Fabric, curved metal ribs, and carefully finished edges give the fixture definition both switched on and off.
Each panel overlaps to build the rounded floral silhouette.

The visible weave adds warmth and gently diffuses the bulb light.

Contrasting ribs outline the petals and meet at a decorative center detail.
Choose the profile and diameter according to the room scale, ceiling area, and how strongly you want the floral shape to read.


Style A has a shallower, more open profile. Style B curves deeper at the center. Both are available in 40, 50, and 60 cm diameters.


| Material | Metal, Fabric |
|---|---|
| Light Source | E27 or E26 bulb (Bulb Not Included) |
| Finish | Gold |
| Colors | Light Beige / Sage Green Light Beige / Dusty Blue |
| Weight | Approx. 6.6 lbs / 3 kg |
| Diameters | 15.7" / 40 cm 19.7" / 50 cm 23.6" / 60 cm |


Use room size and the amount of visual presence you want as the main guide. The larger diameter makes the petal form more prominent.
Best for entryways, hallways, dressing rooms, compact bedrooms, and smaller ceiling areas.
A balanced choice for bedrooms, dining areas, home offices, and average-sized living rooms.
Suited to larger bedrooms, living rooms, dining rooms, and spaces where the floral shape should become a focal point.
Modern, elegant design. Easy to install and set up! It gives the room a beautiful soft glow.
Very nice product for this price. Look really quality. Cute! Good quality! You get what you pay for!
Beautiful light, exactly what i was looking for. Would highly recommend
This is a beautiful light! I think it’s a really good value because the fabric that it’s made of is really quality.
Great value for the price. The brightness is good. Size looks great in the room.
Monulo · The practical guide
Find a starting size, see where to place it, and know what to check before installation.
Find your starting size01 · Get the scale right
For a central ceiling light, enter your room dimensions. For lights above furniture, use the table or island guide below instead.
Measure first, then mock up the actual shape. Suggested dimensions are design starting points; product instructions and applicable local requirements take priority.
02 · Look up
The available drop matters as much as the fixture diameter.
Around 8 ft / 2.44 m
Start with a flush or compact semi-flush design in walking areas. Check the complete installed height.
Around 9–10 ft / 2.74–3.05 m
Pendants become easier to accommodate. Reserve enough clearance below the lowest part of the fitting.
Above 10 ft / 3.05 m
Test larger forms or longer suspension. Confirm cable length, access for maintenance and ceiling support.
Sloped ceiling? Compatibility is model-specific. Confirm the canopy, suspension angle and required drop before ordering.
Room study 01
Let the furniture define the focal point.
Room study 02
Plan the whole row before choosing the quantity.
Room study 03
Use the room formula as a visual starting point.
Room study 04
A consistent rhythm works better than a crowded ceiling.
Room study 05
Put comfortable facial lighting first.
Room study 06
Choose the height from where you actually sit.
Room study 07
Light the page without exposing the source.
03 · Before the tools come out
Bring the product instructions, room measurements and fixture weight to your installer.
01 / Fit
Check door swings, seated views, shade gaps and the lowest point. Include the canopy and suspension in every drop measurement.
02 / Support
Have a qualified installer confirm the box, fixing points and structural support for the complete fixture weight.
03 / Compatibility
Confirm supply voltage, lamp or LED driver, dimmer compatibility, ceiling type and location rating for the exact model.
Hardwired fixtures should be installed by a qualified electrician following the supplied instructions and local requirements. This page explains planning and placement; it does not provide wiring instructions.
04 · The last few details
Measure vertically from the finished ceiling to the lowest point of the assembled fitting. Over a table or counter, measure the remaining gap from that point to the surface.
No. Diameter describes the physical size. Compare lumen output, shade opacity, beam direction and the room’s other light sources separately.
Start with the shade diameter, then draw the complete row to scale. Two larger shades and three small shades can both work; use actual edge gaps and counter-end clearances to decide.
Compare a shorter suspension or a flush alternative that the manufacturer supports. Never shorten a rigid stem or modify wiring without the appropriate product guidance.
No. Check the exact product specification and installation position. Ask a qualified installer to confirm the required damp or wet rating and canopy compatibility.
Include a room photo, ceiling height, room or furniture dimensions, the fixture link and your proposed installation location. For heavier fittings, include any available mounting information.


